Uber
Overview
Link Expensify directly to your Uber account so your Uber for Business receipts populate automatically in Expensify.
How to connect Uber to Expensify
You can do this right in the Uber app:
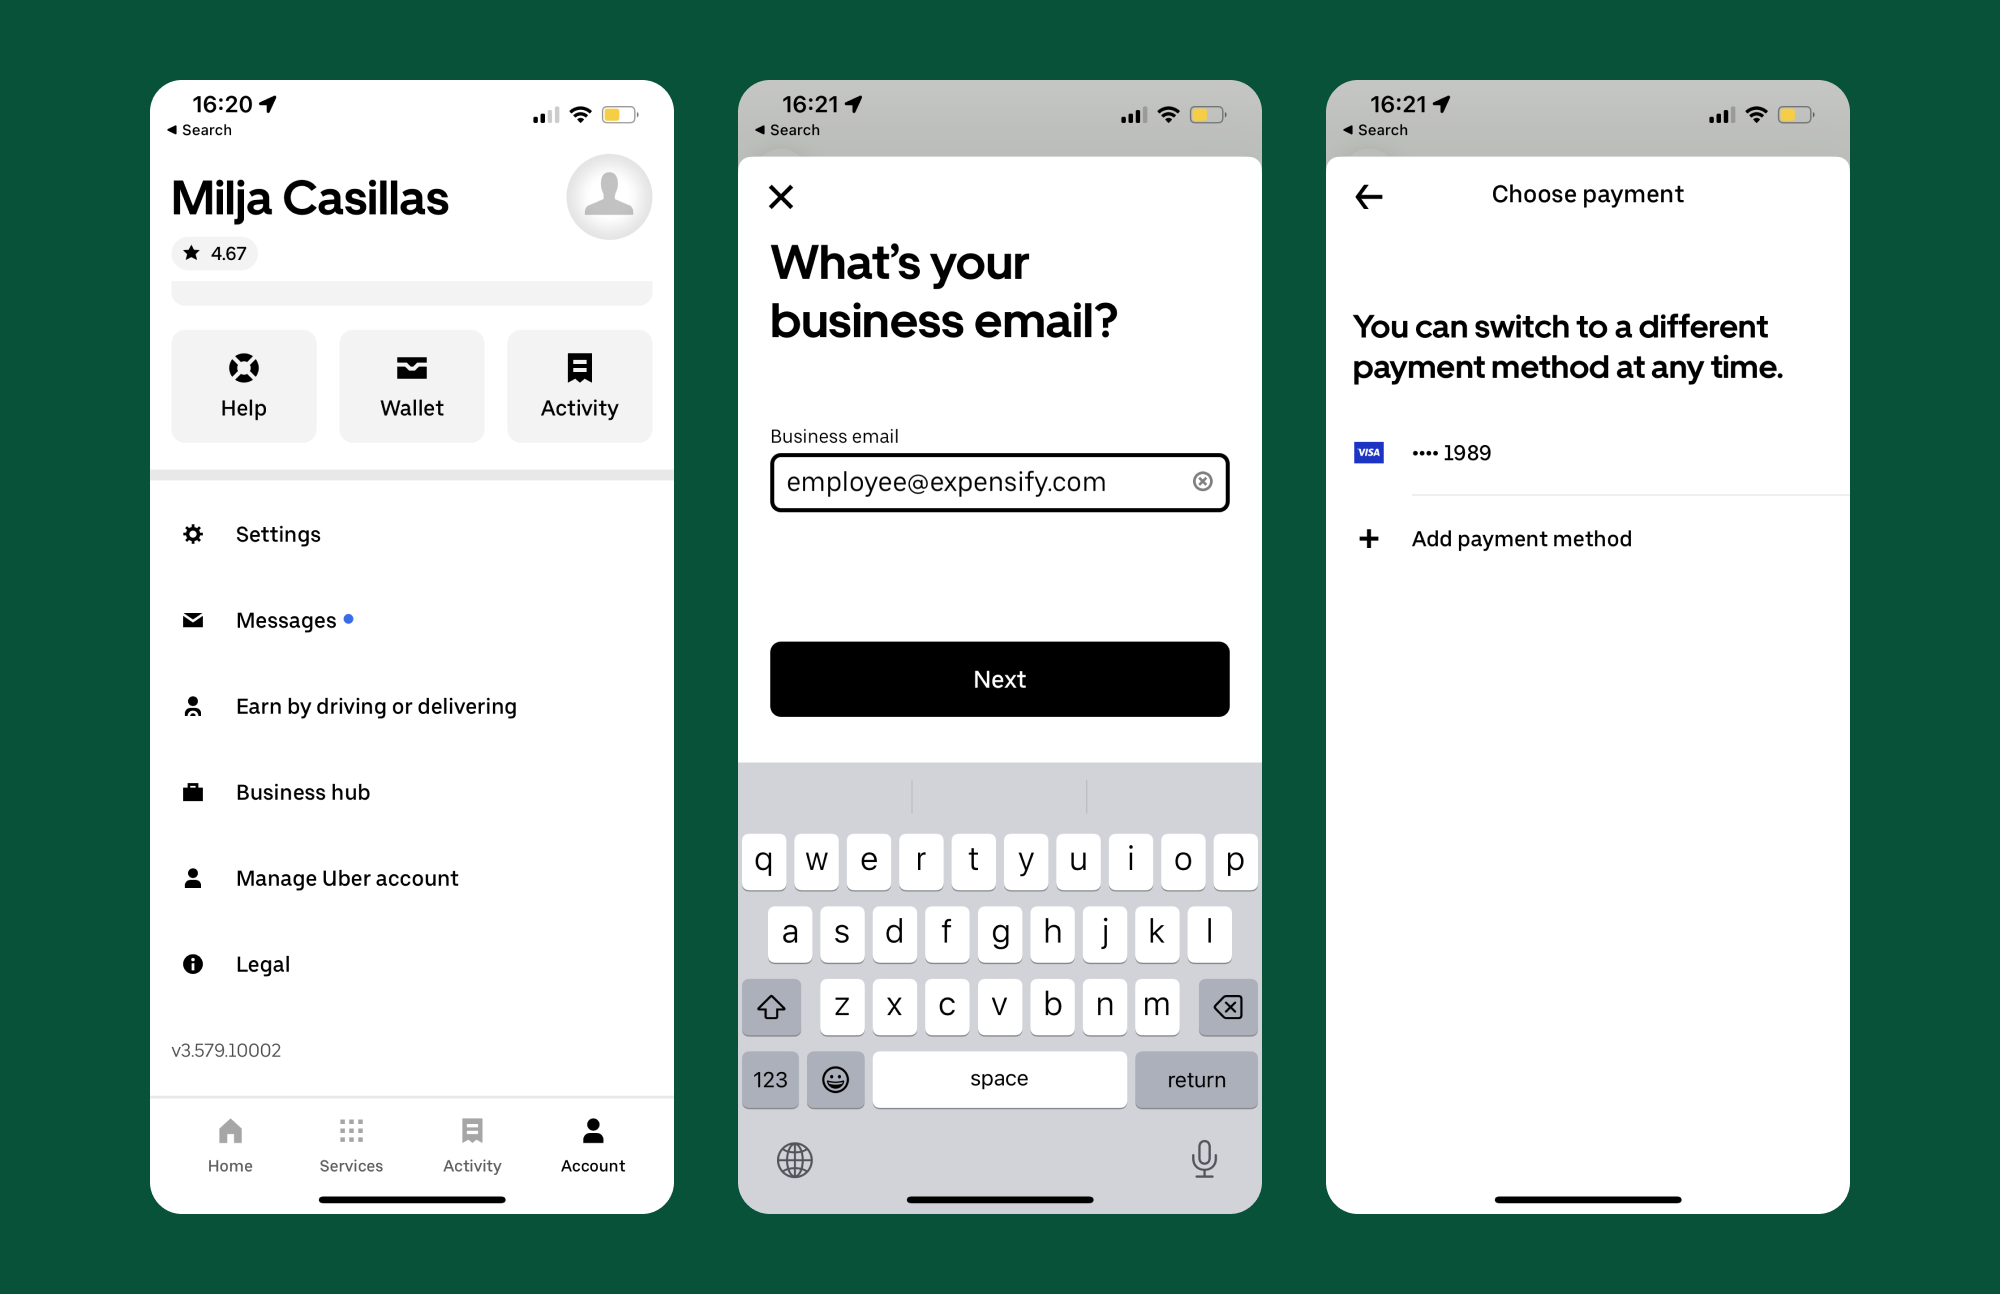
- Head to Account > Business hub > Get started
- Tap Create an individual account > Get started
- Enter your business email and tap Next
- Select the payment card you’d like to use for your business profile
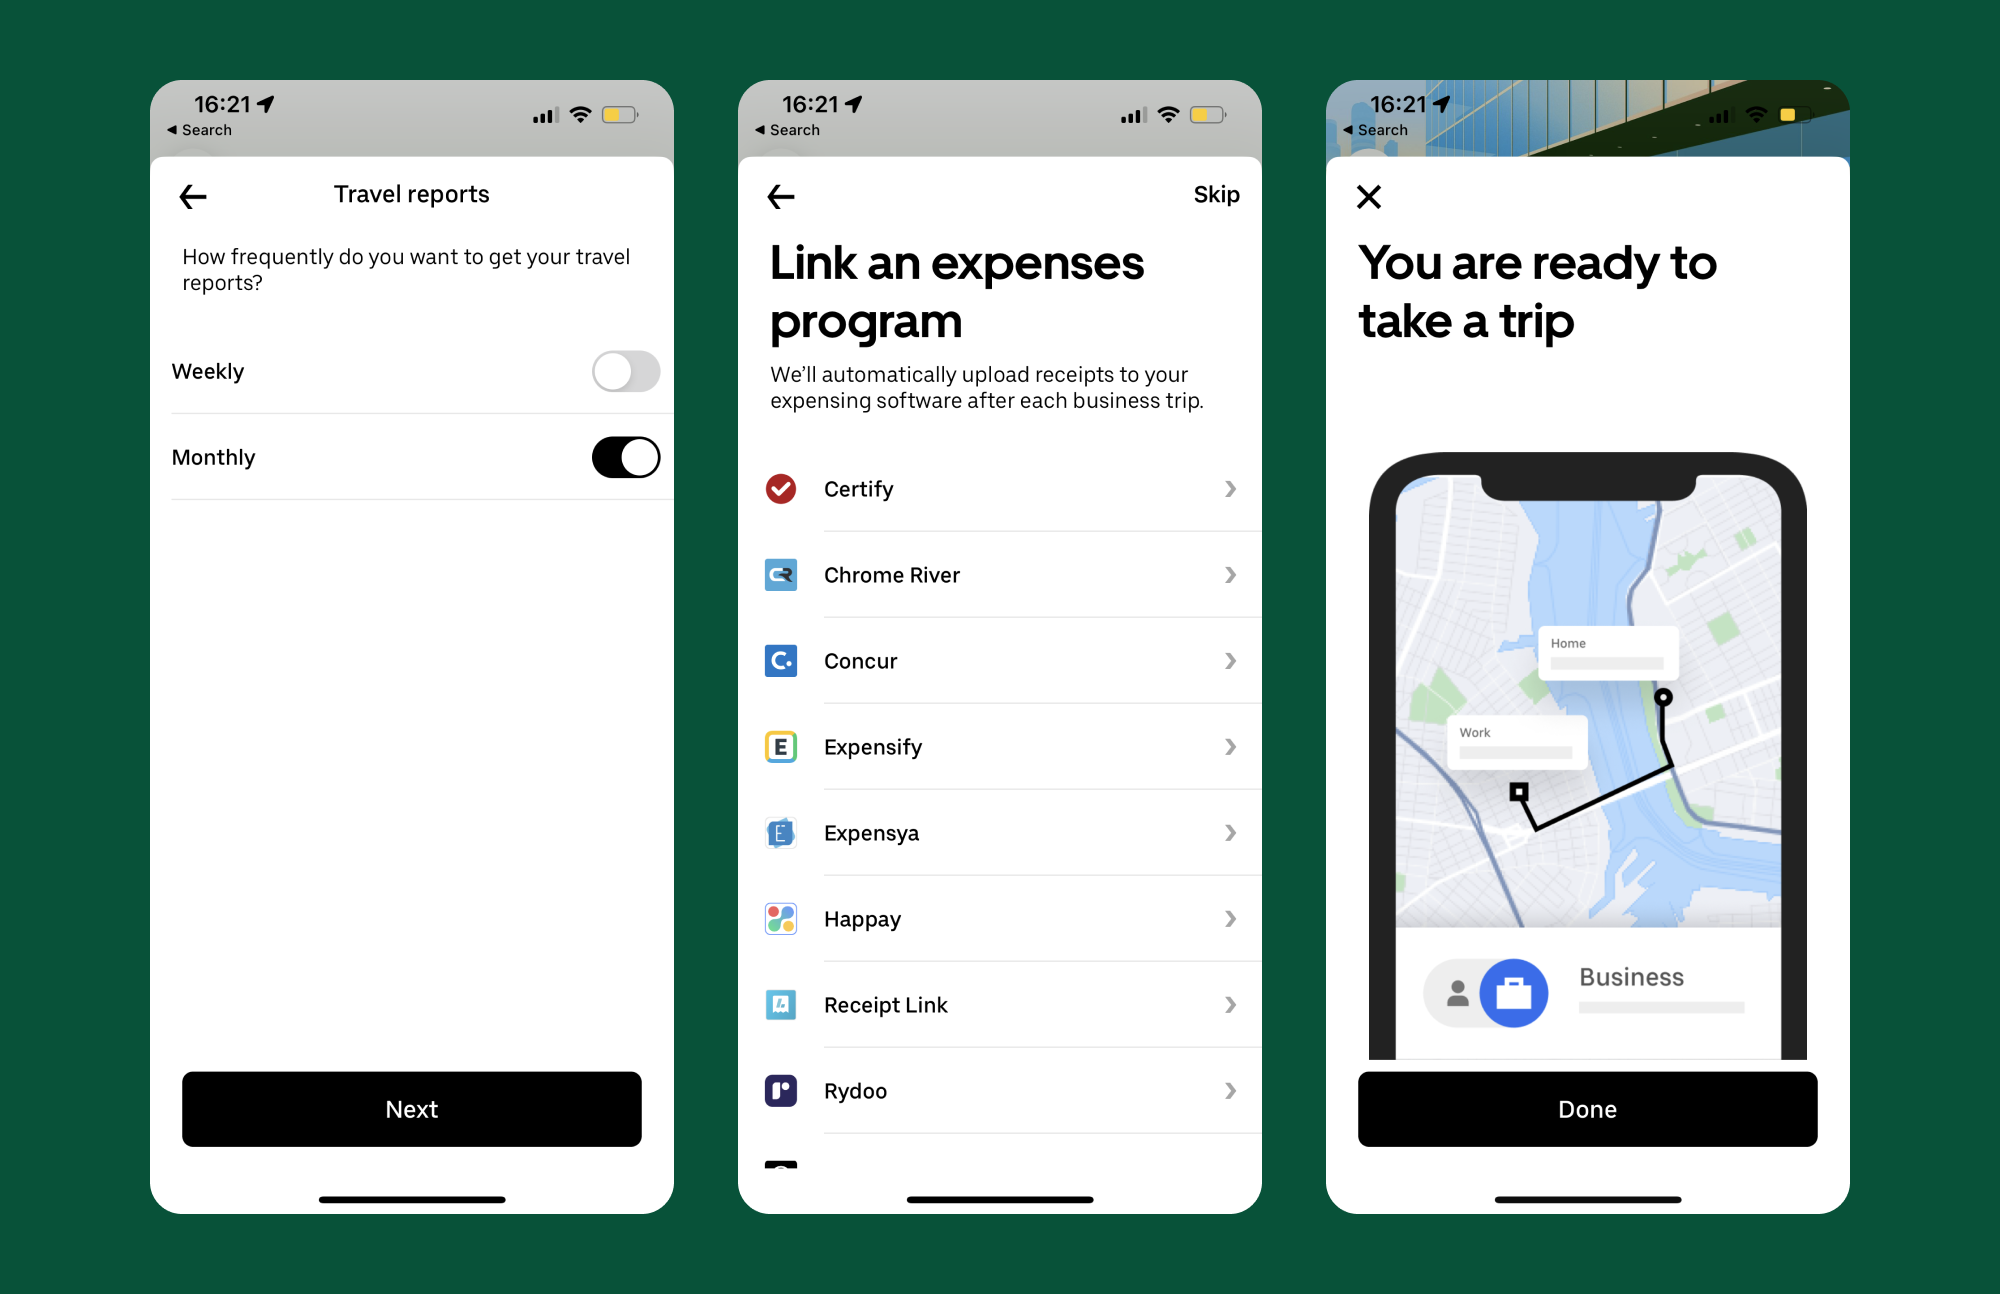
- Choose how frequently you’d like to receive travel summaries
- Select Expensify as your expense provider Expensify and Uber are now connected!
Now, every time you use Uber for Business – be it for rides or meals – the receipt will be imported and scanned into Expensify automatically.


To disconnect Uber and Expensify, simply follow the above path and select Disconnect on the Expensify option.


